Written by Holguer Andres

Introduction to HLS (High Level Synthesis)
Using Verilog, or VHDL as a hardware description language might be difficult for software centric people who have to break the mental paradigm between concurrent software, and concurrent hardware, which sometimes can be confusing, and could be a pain in the ass for many. In addition, while designing a product, or developing a new prototype, using Verilog, or VHDL can be rigorous and tedious, due to the required time for compiling and changing. Furthermore, so many times, the developer wants to implement complex algorithms, trying to port them from C code to Verilog/VHDL manually, but this is a hard task for even an expert developer, and especially it will take a lot of our precious time. However, today we count with different tools that people have might missed due to the lack of information, or maybe the lack of guides to introduce this tools in a clear, and comprehensive way to understand it easily. Among the tools we have HDL-Coder which is Matlab's IP, and you have to pay for it(unless you use an academic purposes license), OpenCL for Altera (Excellent, but Paid as well), LegUp (Free, and looks really promising, though it has been tested on Linux only), C2H (old C to Hardware tool by Altera, but paid), DSP Buiilder (Paid), Altera HLS (not released, but surely paid), Bluespec (Promising but Paid), MyHDL (Python to Verilog tool, really interesting and for free), HLS/HLx (Xilinx Vivado tool for HLS, paid, and academic), and among others.
For this Introduction, it is going to be used HLx to generate Verilog from C code, and this generated Verilog code will be used on Altera's FPGAs to show that even though the tool was designed to be used with Xilinx Devices it can be implemented for Altera's FPGAs as well, following some basic steps.
This manual will be divided into 4 parts.
- Vivado HLx Installation, and introduction.
- Generating C to Verilog using different optimization methods(heuristics).
- Simulating, and Debugging the C code, and Verilog Using Vivado HLx, and Modelsim.
- Compiling the Generated Verilog File using Quartus.
Procedure
- First you must download the Vivado Hlx and install it on your machine, making sure you download the WebPack Edition to use the academic license, you have to register first on the webpage and then download the WebPack edition.
- Once you have downloaded the HLx, you have to install it as WebPack Edition.


- After installing HLx you need to open it.

- For this example we are going to used an already designed example given by Xilinx, which it is going to be the Fixed Square Root of a number, for this, we press on the button, "Open Example Project", which you can find on the main menu after opening HLx.

- Then you select the example "fxp_sqrt".

- Save this example into any folder you like, for this example, this is going to be saved on:

- Once, HLx creates the project, you will see a folder with the name of "proj_fxp_sqrt", which has inside a source file called "fxp_sqrt_top.cpp" and contains the C function we want to accelerate or convert to Verilog/VHDL. You can double click and explore the function.

- When you double click on the flle "fxp_sqrt_top.cpp" you will find a main function with a inner function which is called "fxp_sqrt", and contains 2 arguments, one is "result", and the other one "in_val", these are the result and the input data to the function "fxp_sqrt" which finds the Square root of a fixed number (that you will see later in this manual). If you right-click on the function "fxp_sqrt", you can explore it by pressing "Open Declaration".

As you might notice, the Square Root of a Fixed point number is a series of calculations(Taylor Series) that are used to find the Square root of a number, in this case we have 4 bits for the integer part and 16 bits for the non-integer part, and this can be changed by parameters on the function sqrt.
It is important to highlight that for this example you will see that the Generated Verilog is compatible with Altera's FPGA because the C code does not contain highlevel mathematical operations, all the operations are calculated using Taylor Series, which makes that the HLx generates a Verilog code without any IP cores.
- Once you have explored the function, and get familiarized with it, press on the menu "Project->" the button "Project Settings..."

- It will take you to the project settings, in which you can find "Synthesis", and you can set the top function you want to accelerate, in this case, you can see that the function to accelerate is the one called "fxp_sqrt_top", therefore any function inside this will be accelerated as well.

- Now, close the project settings window, and press on the play button to synthesize the project,
 . You will see on the Console, that the C synthesis starts, and Vivado starts running different scripts.

- When all the scripts have been implemented by HLx, you will see a message on the console that says that it was generated a Verilog module and and RTL for the module.

- Now it is time to evaluate the reached performance of the accelerated function, this can done if you go to the right top corner, and press the button "Analysis"

- Click On the tap "Performance" to see the required time for the accelerated SQRT function to generate a result.

- You will see the review of all the required operations in each different clock cycle, for instance on the Cycle 19, there are 9 concurrent operations that HLx are taking to reduce the time, instead of calculating each one individually as software would do, the HLx compiler saw that in that particular clock cycle 9 operation can be performed in parallel, this was done using Heuristic algorithms or also called Optimization algorithms. You can explore more into the details by pressing right click on each operation to go to the source of the C code, or Verilog Code.
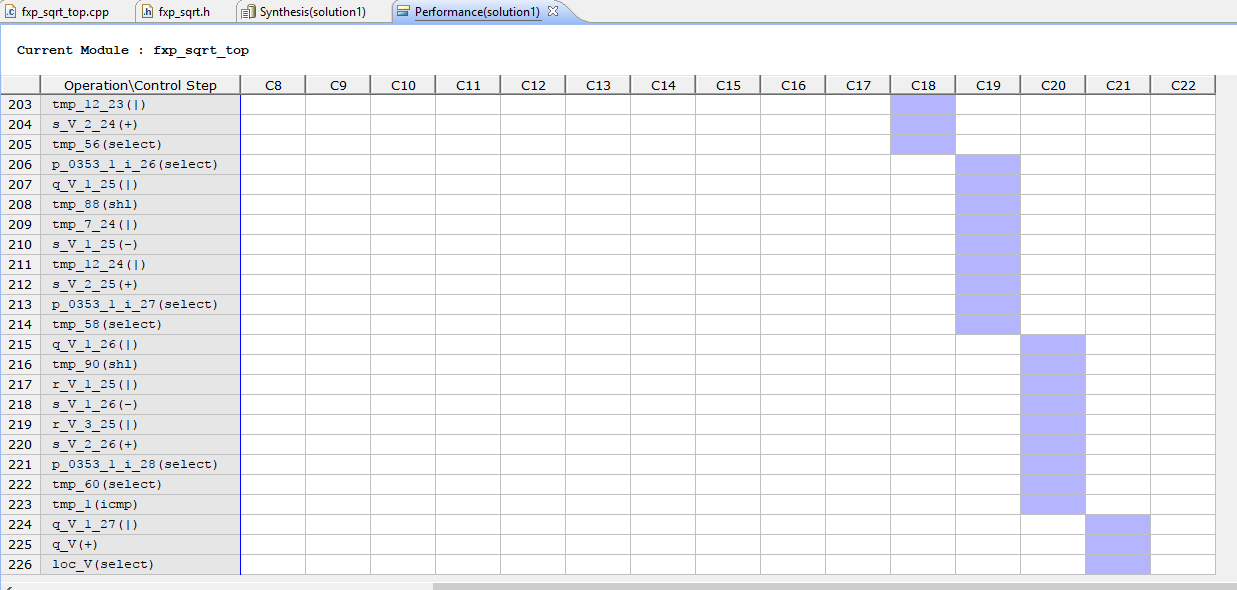


- To see other summary details of the performance you can go to the tap "Synthesis" to check on the Performance Estimates, which tell you that the latency of the function you just accelerated is 22 Clocks.

- Once you have familiarized with the basics of HLx, it is time to use the different kinds of optimizations you can apply to the C code to vary the performance of your results. In this example, as it is a template, different optimization methods were applied, to see them, go back to the main code on the function "fxq_sqrt_top", and then click on the right top corner on "Synthesis", you will see different optimization methods that are being applied to this function, among we find one with the name of "HLS_PIPELINE rewind", please right click and remove it to see what the different is when this optimization method is removed.

- Save.
- Press again the button play to synthesize the project again, , and go back to check the performance report.

- Now you sill see that the latency has been increased by 38 cycles, which are all on the "loop 1". This means that the optimization mode for PIPELINE is not activated which means that the loops inside the function "fxp_sqrt_top" are going to be treated as simple Finite States Machines, which affects the performance dramatically.
- Now go back to the top function "fxp_sqrt_top", and press again on "Synthesis", then right click on "fxp_sqrt_top" to insert Directive...

- On the window "HLS Directive Editor", add the directive "PIPELINE", as it is shown in the next image.

- Save.
- Press again the button play to synthesize, and you will observe that the latency will return to 22 cycles as initially.

- As a complementary Material for Optimization you can read the following material on your own to know more about heuristics and optimization, I am certain this material will be really illustrative to get started with these concepts.
- Retaking, go to the navigation project on the folder "solution1" you will find a folder named "syn", this folder contains the generated Hardware in SystemC, Verilog, and VHDL. You can go to the folder in which you saved the project and find these files. Open the Verilog File, and explore it, you will find that the inputs and outputs of the module meet the standard of using a start, done, idle, and ready signals, which makes it easy to implement.


- If you have ModelSim you can simulate the Verilog file easily, and try it out to check whether or not it works, in the following image it is shown a simulation with modelSim using as an input the number 2(in_val_V), a clock of 50 MHz.

As the simulation shows, counting right after the start signal, it is required 22 clocks to calculate the sqrt of any input number. Concurrently with the output, the done signal will change automatically to 1, for this example the result is "0x0016a0a" which can be calculated as 1.414215087890625.

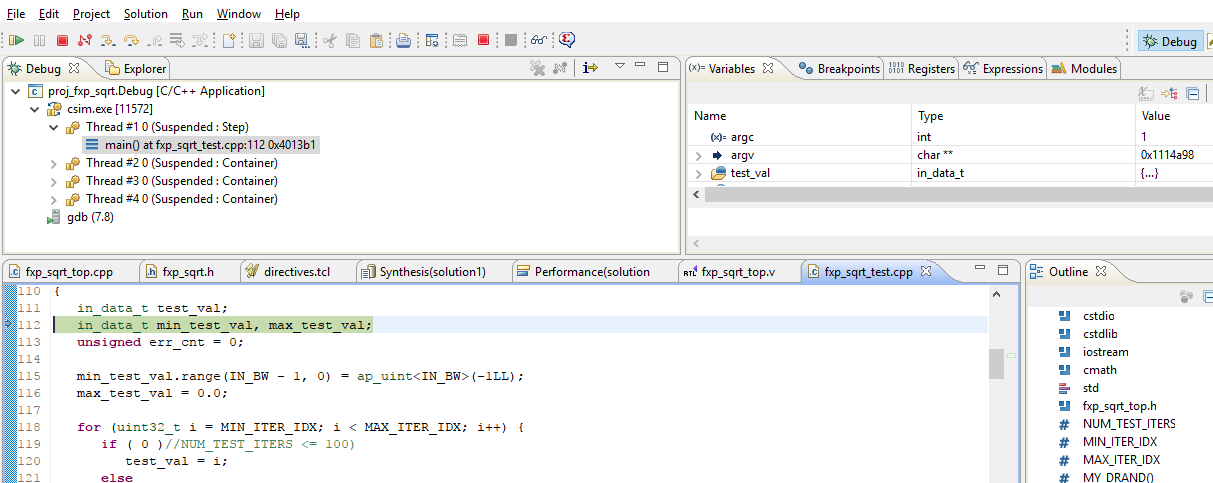
- It is important to highlight that ModelSim works for simulating the Generated Verilog module. Nevertheless, you can also debug the code using HLx. If you go to the right top corner and press on the button "Debug" you can debug the C code as any regular code, using the step over, step in, pause and play buttons.

- After you have debugged the code, and simulated the Verilog/VHDL or whatever, it is time to implement the Verilog code on an Altera's FPGA. This can be done by simply copying the module on your project, and instantiate it.

- Once complied, the FPGA can be programmed with the generated SOF file (For this example the Cyclone V GX starter kit board was used).

- Congrats!!, now it is your turn for testing, maybe Mandelbrot?, maybe Raytracing? or any other algorithm you might like to accelerate, Why don't you combine this along with Nios II, or the HPS?
- The solution of this manual can be downloaded from here.