-
-
Category: Cores
-
-
Hits: 11658
Written by Holguer Andres
W5100 Qsys Component.
This Qsys component has been designed to be used with the chip Wiznet W5100 alongside the soft-core Nios II.
This manual will tell you how to implement it using the DE0-NANO, and C5GX, and is divided into two parts:
- Hardware Part.
- Quartus Project.
- Qsys.
- PINOUT Connections.
- Software Implementation.
- WebServer Example.
Requirements
- W5100 module.
- DE0-NANO (Not to be limited, you can used any other board).
- Arduino Female-Female wires.
- Quartus 14.1 or above.
Procedure:
Hardware Part
- Quartus Project.
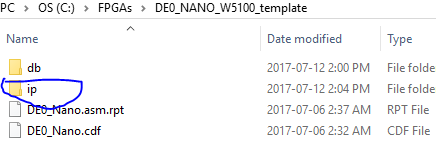
- To start with this part, we will help you by generating a template system for the DE0-NANO, which can be downloaded it form here.
- Decompress and open the Quartus project template.
- You will see an instantiation which is a basic qsys system that you are going to modify in order to get the W5100 working properly.
- Qsys.
- Download the following folder, and paste it on the project directory.
- Click on the Qsys Button
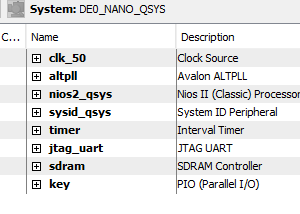
 , and open the file "DE0_NANO_QSYS.qsys".

- Then you will see a basic system Nios II structure with all the basic components to start with
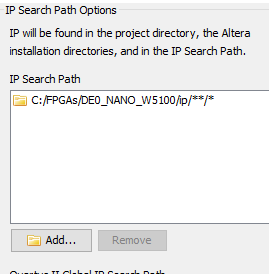
- Now, go to the menu "Tools->Options", and add to the "IP Search Path" the ip folder you just copied to the project directory.
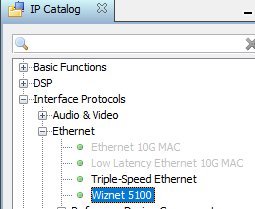
- Now save the Qsys project, close it and reopen it.
- On qsys, search on the IP catalog the component "Wiznet 5100" under "Interface Protocols->Ethernet", select and add it to the qsys project.
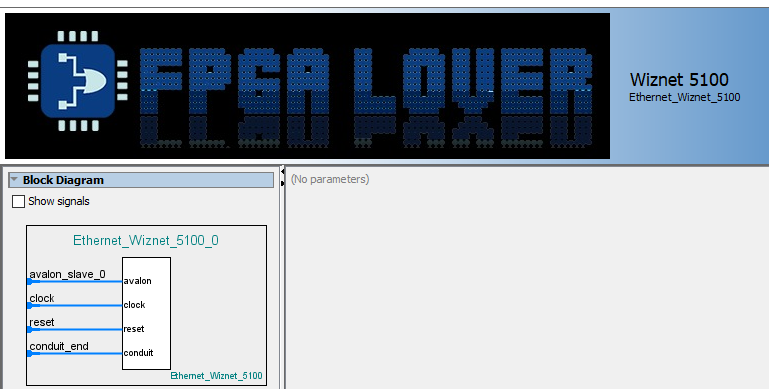
- Now connect the Wiznet 5100 module as follows:

- Now save the Qsys project.
- Go to the menu "Generate->HDL Example", and you should see something like this
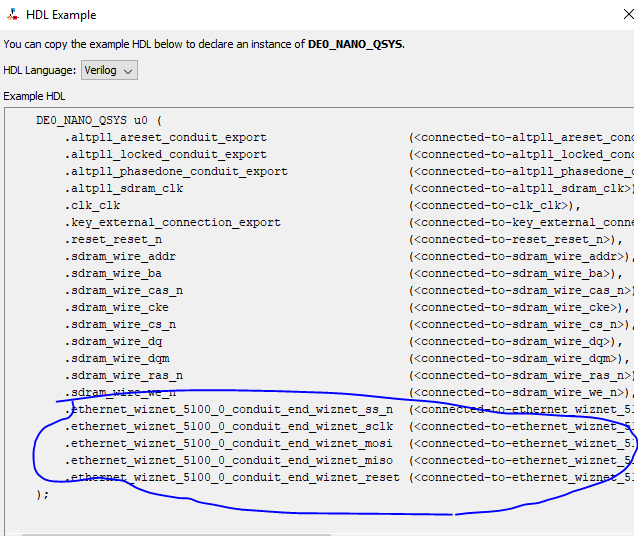
- Select and copy only the lines with the name of "ethernet_wiznet_5100_0".

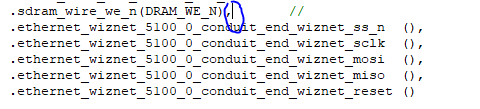
- Go back to Quartus without closing the Qsys project, and paste the copied code on the line 148.
- Go back to the Qsys system, and generate the Qsys system by pressing the button "Generate HDL"
 .
.
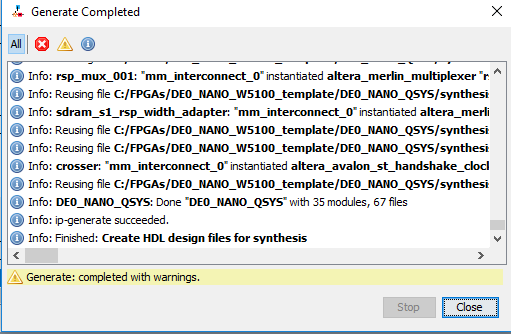
- Once generated, close Qsys.
- PINOUT Connections.
- Now it is time to connect the W5100 module to the GPIOs of the DE0-NANO, for that, I have decided to connect the Wiznet pins to the following GPIOs:
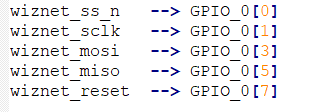
it is important to highlight that depending on the board you are using, you should check on the board Pinout, which might vary depending on the manufacture.
For the Mini board:

For the Arduino Etherner Shiled:

Here the DE0-NANO PinOut:
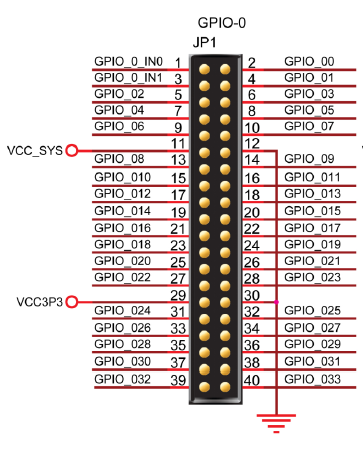
- Connect the GPIOs on the Verilog Instantiation.

- Save.
- Compile the project.
- Well done you have now finished with the Hardware part!!!.
- Here the Hardware Solution just in case you might have missed a detail.
Software Implementation
- WebServer Example.
- Open the Nios II IDE as admin

- Select as a workspace just the name "fpgas"

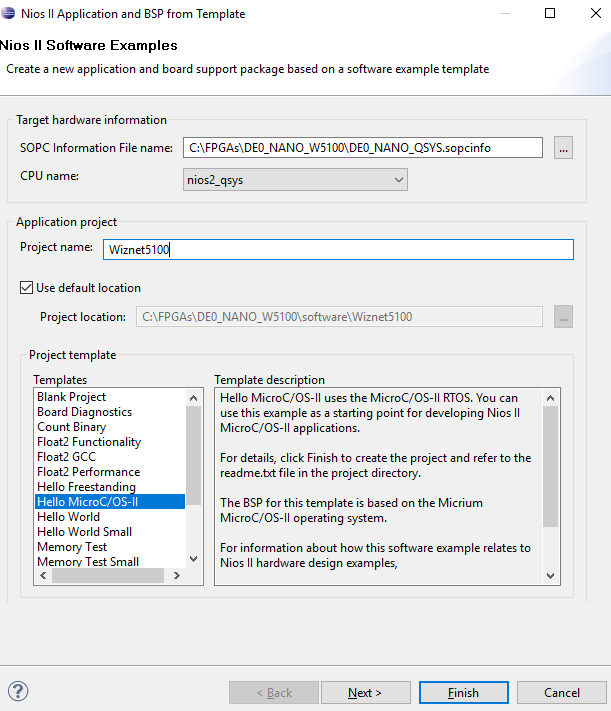
- Once the IDE is opened, go to the menu "File->New->New Application and BSP from template", select the template "Hello MicroC/OS-II", select the target hardware information using the file "DE0_NANO_QSYS.sopcinfo", name the project with "Wiznet5100", and press finish.
- After this, two folder will be created "Wiznet5100", and "Wiznet5100_bps"

- To verify that the created project was created properly compile the project application by right-clicking on the folder "Wiznet5100" Build Project.
- if the project was created properly, you will see that an ELF file with a bug is created into the "Wiznet5100" folder
 .
.
- Now, download the folder "winzet", and paste it into the "Wiznet5100" folder, which contains the W5100 Drivers.

- Right-click on the Wiznet5100 folder, and clean the project.
- Now it is time to edit the code of the hello_ucosii.c file. and replace it for the following.
-
// --------------------------------------------------------------------
// Copyright (c) 2017 by FPGALOVER
// --------------------------------------------------------------------
// web: http://www.fpgalover.com
// email: This email address is being protected from spambots. You need JavaScript enabled to view it. or This email address is being protected from spambots. You need JavaScript enabled to view it.
// --------------------------------------------------------------------
// Author: Holguer Andres Becerra Daza
// Description: SW example
// --------------------------------------------------------------------
// **************************************************************************/
#include <stdio.h>
#include "includes.h"
#include "wiznet/W5100_configs.h"
/* Definition of Task Stacks */
#define TASK_STACKSIZE 2048
OS_STK task1_stk[TASK_STACKSIZE];
OS_STK task2_stk[TASK_STACKSIZE];
/* Definition of Task Priorities */
#define TASK1_PRIORITY 1
#define TASK2_PRIORITY 2
void http_server(void* pdata);
void init_hw();
void init_hw() {
if (!reset_wiznet()) {
printf("-- Wiznet-Ethernet Fail(SPI)\n");
} else {
printf("-- Wiznet-Ethernet SPI Succeeded\n");
}
}
//HTTP Server example
void http_server(void* pdata) {
init_hw();
if (init_dhcpc_ch(_DHCP_SOCKET) == 0) {
printf("IP STATIC or DHCP not Working, check Flags...\n");
}else{
}
HTTP_Init(HTTP_SOCKET, HTTP_PORT);
while (1) {
HTTP_Server_example();
OSTimeDlyHMSM(0, 0, 0, 100);
}
}
/* The main function creates two task and starts multi-tasking */
int main(void) {
OSTaskCreateExt(http_server,
NULL, (void *) &task1_stk[TASK_STACKSIZE - 1],
TASK1_PRIORITY,
TASK1_PRIORITY, task1_stk,
TASK_STACKSIZE,
NULL, 0);
OSStart();
}
- Now you can pore through the code and explore it, look especially into the method "HTTP_Server_example()", which contains all the logic about the web sever. In addition, you can take a look into the "wiznet" folder, especially the file "W5100_configs.h" which contains all the Wiznet w5100 driver configurations.
- Build the software project.
- Program the .SOF of the system using the Quartus Programmer, and run the generated .elf File.
Note: The Wiznet module should be properly connected to the DE0-NANO, and plugged to the Ethernet cable for the testing.
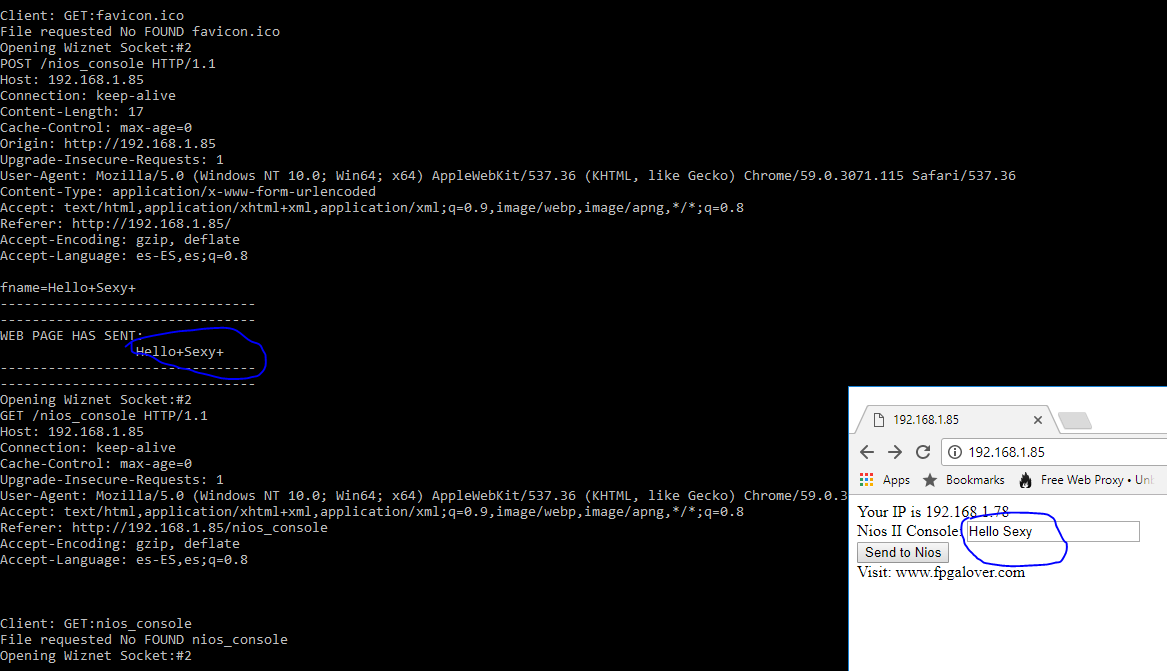
- Now you will see on the Nios II console a message telling whether or not the wiznet module has been successfully initialized, if so, you will see an assigned IP by the DHCP, which you can use and paste it on the web navigator of your preference to see the web page working, as it is seen in the following images.

- Finally and for you relief I have left the solution on the following link so that you can try it if you have any problem testing, in addition the solution comes with a Python Script and a TCP example solution for you to try it.
The sources for the C5GX board using the arduino Header has been uploaded as well and can be downloaded from here.